German/English:
Wie erhalten Sie optimale Scanergebnisse?
1. Briefmarke muss in unserer Datenbank gespeichert sein
Wir haben allein im Jahr 2021 über 60 Länder und über 400.000 Tsd. Marken hinzugefügt und erweitern diese regelmäßig. Dennoch kann es vorkommen, dass eine Region, eine Jahreszahl, bestimmte Sondermarken oder Eigenmarken nicht verfügbar sind und somit nicht gefunden werden können. Wenn bei Ihnen dieses Problem auftritt, dass trotz ausreichender Beleuchtung und Schärfe Ihrer Aufnahme die Marke nicht zu finden ist, kontaktieren Sie uns sehr gerne unter support@stamp-manager.com. Wir sind stets darum bemüht, die Ergebnisse immer weiter zu verbessern!
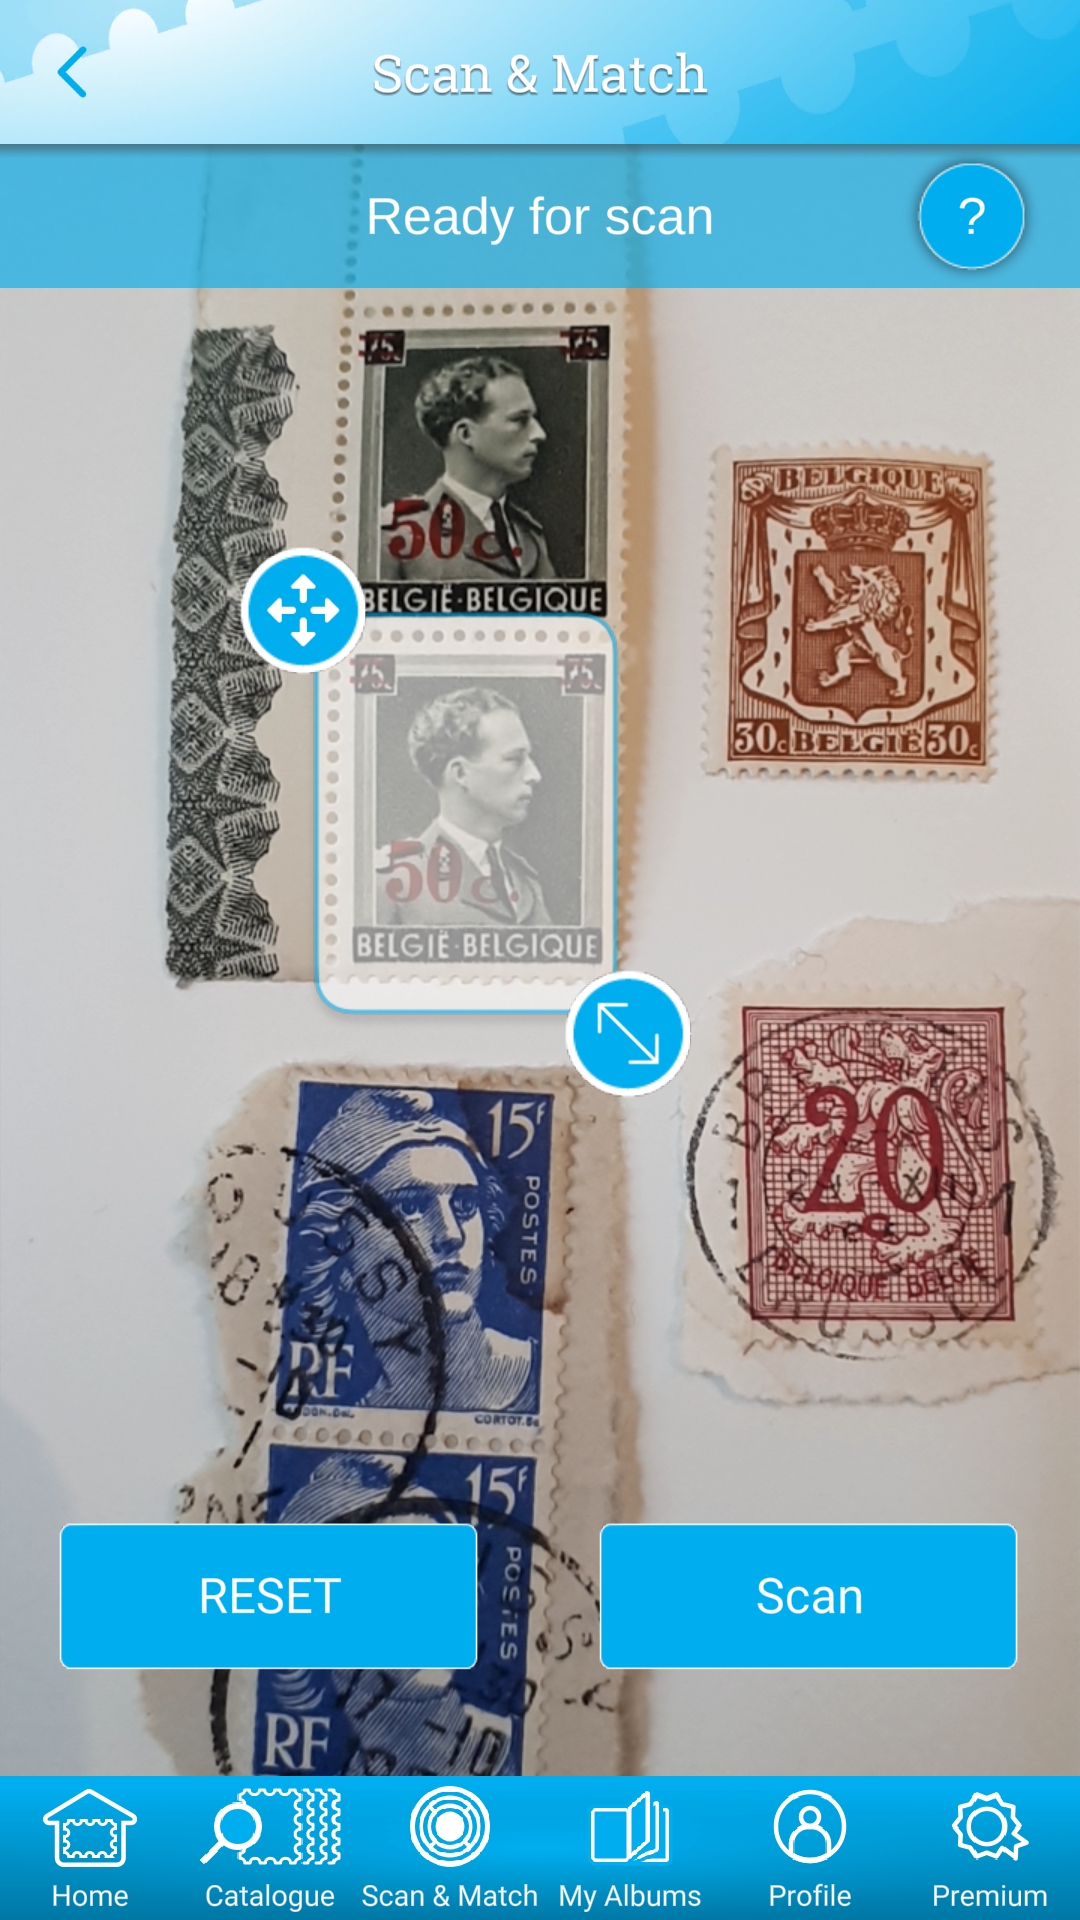
2. Anleitung „Manueller Scan“
Der manuelle Scan eignet sich sowohl für Einzelmarken als auch für mehrere, zum Beispiel direkt aus einem Sammelalbum. Achten Sie wieder darauf ein scharfes Foto mit ausreichend Beleuchtung zu erstellen. Nun können Sie bequem mittels des Fensters Ihre zu erkennende Wunschmarke auswählen. Klicken Sie anschließend auf „Scan“ um diese Marke zu finden, bzw. auf „Reset“, wenn Sie ein neues Bild aufnehmen möchten.
Wir danken Ihnen für Ihr Interesse und Ihre Treue und wünschen Ihnen weiterhin viel Spaß mit unserem Stamp-Manager!
Ihr Stamp-Manager Team
P.S. Bei Fragen kontaktieren Sie uns gerne unter support@stamp-manager.com! Wenn Sie noch mehr über technische Hintergründe dieser Technologie erfahren wollen, scrollen Sie gerne runter, hier erklären wir die Funktion nochmal im Detail!
![]()
How do you get the best scan results?
1. Postage stamp must be stored in our database
In 2021 alone, we added over 60 countries and over 400.000 stamps and are expanding them regularly. Nevertheless, it can happen that a region, a year, certain special stamps or own stamps are not available and therefore cannot be found. If you encounter this problem that the stamp cannot be found despite sufficient lighting and sharpness of your picture, please contact us at support@stamp-manager.com. We always strive to keep improving the results!
2. Instructions „Manual scan“
The manual scan is suitable for single stamps as well as for several, for example directly from an album. Again, make sure to take a sharp photo with enough lighting. Now you can conveniently select your desired stamp to be recognized by means of the window. Then click on „Scan“ to find this stamp, or on „Reset“ if you want to take a new picture.
Thank you for your interest and your loyalty and we hope you continue to enjoy our Stamp Manager!
Your stamp manager team
P.S. If you have any questions, please contact us at support@stamp-manager.com! If you want to find out more about the technical background of this technology, please scroll down, here we explain the function in detail!
![]()
Für Technikfans! Wie funktioniert dieser Scan & Match überhaupt?
Wir leben in einer hochtechnisierten Zeit, in der man denken könnte: „Kann ja nicht so kompliziert sein, eine einfache Briefmarke zu scannen!“ Die Wahrheit dahinter ist aber, dass ein Bildscanner auch in der heutigen Zeit eine komplexe Angelegenheit ist, zumal Briefmarken mit ihren vielen kleinen Details eine ziemliche Herausforderung für die Software darstellen.
Wenn Sie keine Resultate bekommen, kann das mehrere Gründe haben. Meistens:
- Die gescannte Briefmarke ist nicht in unserer Datenbank.
- Die Briefmarke ist in der Datenbank, kann aber trotzdem nicht erkannt werden.
Warum passiert das?
Der Image Scan verwendet 2 Phasen.
Phase 1: es wird versucht den Rahmen der Briefmarke zu erkennen. Gelingt dies, startet
Phase 2: hier wird die ausgeschnittene Marke an den Bild-Erkennungs-Server geschickt
Es ist nun wichtig, dass Ihr Foto der Briefmarke so analog wie möglich ist zu dem Bild, das in der Datenbank gespeichert ist.
Ihre Fotos, die Sie in der App gemacht werden, haben nun meist viel mehr am Bild als nur die Briefmarke. Wenn wir dieses Bild sofort an den Bild-Erkennungs-Server schicken, hat dieser keine Chance brauchbare Resultate zu finden.
Um Phase 1 nun erfolgreich abzuschließen, ist es nötig einen möglichst ruhigen, detail- und glanzlosen Hintergrund zu verwenden. Wir erinnern uns, die Marke soll am Foto so deutlich und unverzerrt wie das Original aussehen.
Wir haben ein paar Faustregeln aufgestellt um „richtiges Scannen“ zu erleichtern.
Optimal:
- kontrastreicher Hintergrund zur Briefmarke (dunkle Marke -> heller Hintergrund / helle Marke -> dunkler Hintergrund)
- Hintergrund mit flacher Farbe (keine Details)
- scharf gestelltes Bild
- nur eine Marke im Bild!
- von oben fotografieren ohne viel Verzerrung
Nicht optimal:
- Raum als Hintergrund (ich halte die Marke zwischen den Fingern z.B.)
- Marmorierter Holztisch als Hintergrund
- Finger auf der Marke
- mehrere Marken im Bild
- wenig Kontrast zur Marke (z.B.: weißer Briefmarkenrahmen auf weißem Hintergrund)
- schräg fotografieren mit sehr hoher Verzerrung
Beispiele
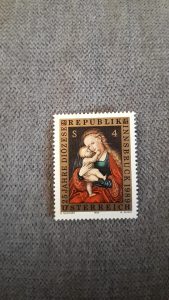
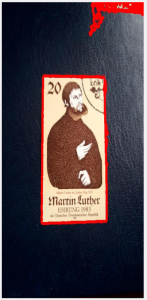
Nicht optimal ist hier der sehr detaillierte Hintergrund der falsche Konturen erzeugt. Dennoch gibt es durch den guten Kontrast eine vollständige Kontur und die Marke kann perfekt erkannt werden.

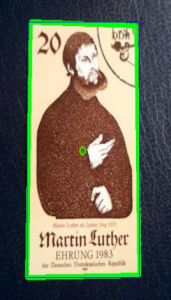
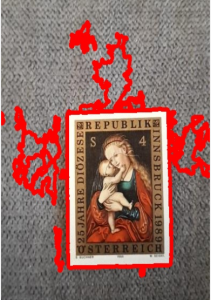
Sehr guter Kontrast. Nicht optimal ist der Licht-Einfall auf das Leder da es einen hohen Detailgrad erzeugt und damit falsche Konturen. Aber auch hier wird die Marke akkurat erkannt.
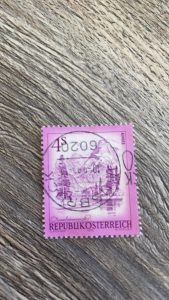
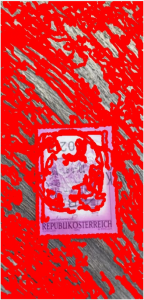
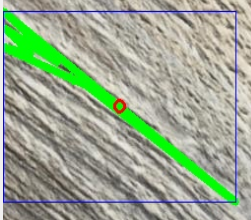
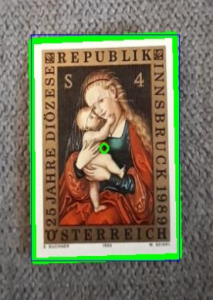
Guter Kontrast aber zu hoher Detailgrad im Hintergrund. Dadurch kann die Kontur der Briefmarke nicht genau erkannt werden und liefert ein falsches Resultat an den Bild-Erkennungs-Server.
Wir hoffen mit den Beispielen und Tipps das Mysterium von Scan&Match etwas gelüftet zu haben.
Wir sind ständig dahinter, dieses Verfahren weiter zu verbessern und werden in Kürze direkt beim Scanvorgang anzeigen, ob das Ausschneiden von Phase 1 geklappt hat, damit auch sofort ersichtlich ist, ob das Problem nun am Ausschneiden liegt oder daran, dass die Marke nicht in der Datenbank vorhanden ist.
Wir danken Ihnen für Ihr Interesse und Ihre Treue und wünschen Ihnen weiterhin viel Spaß mit unserem Stamp-Manager!
Ihr Stamp-Manager Team
![]()
For Tech-fans! How does this Scan & Match even work?
We live in a high-tech era in which one might think: “It can’t be that complicated to scan a simple postage stamp!” But the truth behind this is that an image scanner is a complex matter even today, especially since postage stamps are involved their many small details present quite a challenge for the software.
If you don’t get any results, there could be several reasons. Usually:
The scanned stamp is not in our database.
The stamp is in the database, but it still cannot be recognized.
Why is this happening?
The image scan uses 2 phases.
Phase 1: an attempt is made to recognize the frame of the postage stamp. If this succeeds, starts
Phase 2: here the cut out mark is sent to the image recognition server
It is now important that your photo of the postage is as analogous as possible to the image that is stored in the database.
The photos you took in the app now usually have much more to do with the picture than just the stamp. If we send this image to the image recognition server immediately, it has no chance of finding useful results.
In order to now successfully complete phase 1, it is necessary to use a background that is as calm as possible, without any detail or lack of luster. We remember that the brand should look as clear and undistorted in the photo as the original.
We have established a few rules of thumb to make „correct scanning“ easier.
Optimal:
high-contrast background to the postage stamp (dark stamp -> light background / light stamp -> dark background)
Flat color background (no details)
focused image
only one brand in the picture!
take photos from above without much distortion
Not optimal:
Space as a background (I hold the mark between my fingers, for example)
Marbled wooden table as a background
Finger on the mark
several brands in the picture
little contrast to the stamp (e.g .: white stamp frame on white background)
Take pictures at an angle with very high distortion
Examples
The very detailed background that creates the wrong contours is not optimal here. Nevertheless, there is a complete contour due to the good contrast and the mark can be recognized perfectly.
Very good contrast. The incidence of light on the leather is not optimal because it creates a high level of detail and thus wrong contours. But here, too, the brand is accurately recognized.
Good contrast but too high a level of detail in the background. As a result, the contour of the postage stamp cannot be precisely recognized and delivers an incorrect result to the image recognition server.
We hope that with the examples and tips we have uncovered the mystery of Scan & Match.
We are constantly working to further improve this process and will shortly show during the scanning process whether the cutting out of phase 1 worked so that it can be seen immediately whether the problem is due to the cutting or the fact that the mark is not in the Database exists.
Thank you for your interest and your loyalty and we hope you continue to enjoy our Stamp-Manager!
Your stamp manager team